PROJECT: WIRE SCULPTURE
This project was especially difficult. The wire was hard to bend and get to the shape that I wanted. It took me a very long time to create this piece, but if I am being honest, I would not try this again
Here I have attached a link to a tutorial so that you can try this on your own: http://alexaraemears.blogspot.com/
Monday, December 8, 2014
Pinch Pot
PROJECT: PINCH POT
Originally I did not know that I was going to create a leaf, the reason that I did this was because I kept trying out various things, and nothing was working so I finally just started pinching and this is what I ended up with. This was nice because we had a lot of freedom and we were given multiple options when it came to the paint. I chose to do mine with acrylic and sponge on various colors
Here I have attached a link to a tutorial so that you can do this on your own: http://myartisticodyssey.blogspot.com/
Batik
PROJECT: BATIK
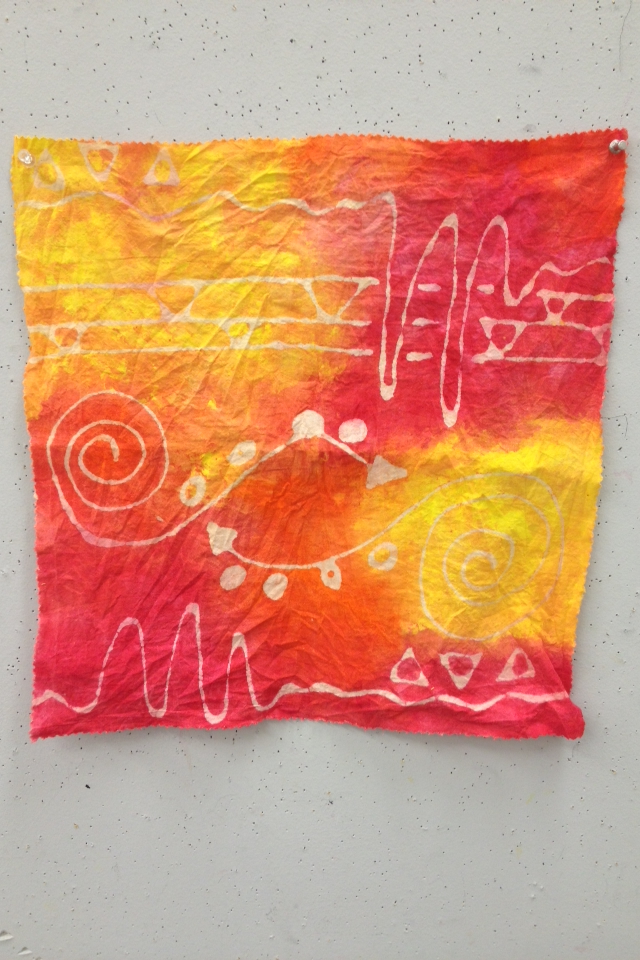
This one was inspired by an example of this that I saw in class. I noticed that they used symbols, and swirls and so I decided to do the same. I chose this color scheme because I think that it goes together well, and the symbols that I chose are representative of the sun and the outdoors, so I felt like the yellows and oranges reflected that
Here I have attached a link to take you to a tutorial on how to do this for yourself: http://theartofkids.blogspot.com/
Alien Names
PROJECT: ALIEN NAMES
Sorry this one is upside down, I couldn't get it to turn around on the blog. But for this, I decided to make it crazy. When I was younger I used to think aliens were such a cool concept, so when we started to do this project, I decided that I was going to make it fun! I used glitter, and large flowers, and fun colors, because we were told to make it our version of beautiful, and to me that's what beauty is.
Here I have attached a link to a tutorial so that you can do this on your own: http://www.oodlesofcodles.blogspot.com/
Georgia O'keefe Flowers
PROJECT: GEORGIA O'KEEFE FLOWERS
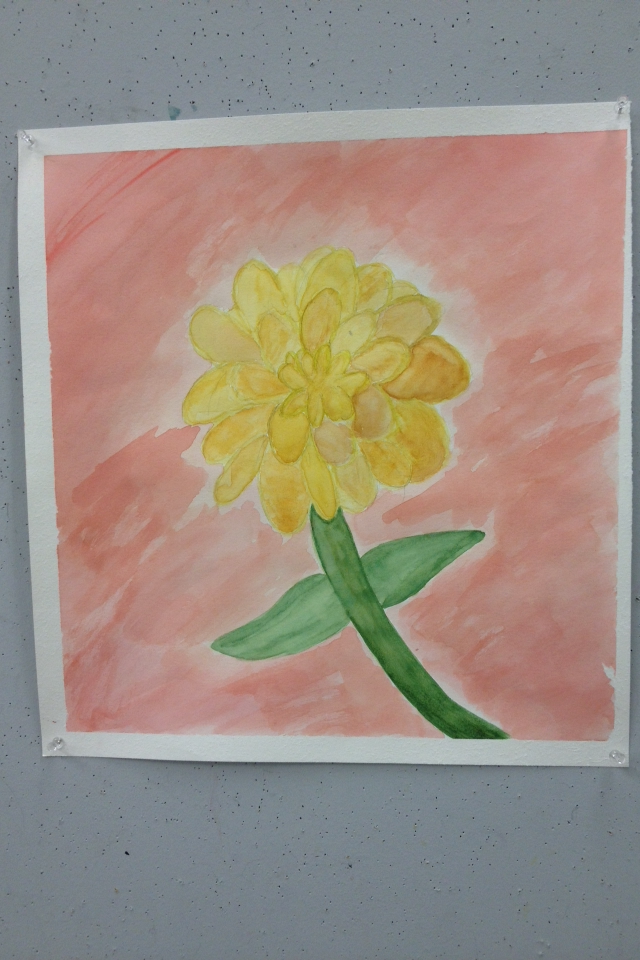
The point of this one was to focus on a certain aspect of the flower, and then paint only that. We were supposed to create dimension with our water colors, and make it look as realistic as possible. I wish that I would have focused more on a specific aspect of the flower, rather than just the flower as a whole
Here I have attached a link that will take you straight to the tutorial on how to make this for yourself: http://kidartintheclassroom.blogspot.com/
Rhythm Sculpture Tutorial
PROJECT: RHYTHM SCULPTURE TUTORIAL
First you will want to gather all of your supplies. You are going to need:
FIRST: Take your piece of black foam that you have cut to be about 6x6"
SECOND: Take whatever material you want to be your first layer and glue it down to the foam. As you can see, this is not symmetrical exactly, but the sides are equal
THIRD: Take whichever material you would like to have as your second layer, and layer it on top of the first however you think will give the piece that rhythmic feel we are looking for, and glue it down
FOURTH: I cut out a few circles and squares from my piece of foam and glued those on as the third layer. I chose to do circles and squares because I wanted to piece to have that sense of symmetry, so I decided to just keep it to these 2 basic shapes. As you can see, I now have 3 layers, so technically I could be finished now if I wished
FIFTH: Even though I have already given my sculpture the required 3 layers, I wanted to include these silly bands to give it more of a fun, whimsical look. These would be my fourth layer, notice how I have stuck to a strict color scheme. This just helps keep the piece from becoming overwhelming
SIXTH: You take the piece of white matte board that you had cut to about an 8x8" square, and you are going to place your finished piece onto that leaving a larger portion of white board showing at the bottom. Once you have placed it on like this, go ahead and glue it there
SEVENTH: The final step here is to take a pen, or sharpie, and sign your name on the bottom of the piece. This will give it the finishing touches it needs. After you are finished you may even want to go around the room and ask each child to "play" their piece for you. This will give you a sense of whether or not they understood how to keep the rhythm here
First you will want to gather all of your supplies. You are going to need:
- a piece of white matte board (roughly 8x8)
- a piece of black foam (roughly 6x6)
- at least 3 different materials to layer
FIRST: Take your piece of black foam that you have cut to be about 6x6"
THIRD: Take whichever material you would like to have as your second layer, and layer it on top of the first however you think will give the piece that rhythmic feel we are looking for, and glue it down
FIFTH: Even though I have already given my sculpture the required 3 layers, I wanted to include these silly bands to give it more of a fun, whimsical look. These would be my fourth layer, notice how I have stuck to a strict color scheme. This just helps keep the piece from becoming overwhelming
SIXTH: You take the piece of white matte board that you had cut to about an 8x8" square, and you are going to place your finished piece onto that leaving a larger portion of white board showing at the bottom. Once you have placed it on like this, go ahead and glue it there
SEVENTH: The final step here is to take a pen, or sharpie, and sign your name on the bottom of the piece. This will give it the finishing touches it needs. After you are finished you may even want to go around the room and ask each child to "play" their piece for you. This will give you a sense of whether or not they understood how to keep the rhythm here
Monday, December 1, 2014
Milk Jug Masks
PROJECT: MILK JUG MASK This project was especially fun because we got to take something as ordinary as a milk jug, and turn it into something extraordinary! I chose to make mine have crazy hair because I felt like since it was supposed to be a mask that I would wear, I thought that it should reflect my personality. I am crazy, so I wanted it to have a bit of a wild side. Yet at the same time, I wanted it to look authentic so I didn't add too much flare because in my mind this would have been used in some sort of sacred ceremony, so I didn't want the mask to be too overwhelming and take away from that.
Here I have attached a link that will take you directly to a tutorial on how to create your own Milk Jug Mask: http://artforchildrenisfun.blogspot.com-/
Here I have attached a link that will take you directly to a tutorial on how to create your own Milk Jug Mask: http://artforchildrenisfun.blogspot.com-/
Subscribe to:
Comments (Atom)


